Far too often, I'll see this on social media: “Hey guys, I have an idea for a pin but I have no idea where to start with this! Anyone know?”

Well, I do! But, the answer to this isn't a short one. There are a lot of options for turning your art into products, but it can be a little overwhelming if you don’t know how to get started. I've run successful crowdfunding campaigns, and produced many pins, patches, stickers and shirts over the years. I'm hoping that with this guide you'll be confident enough to start doing that too.

I will be focusing on the most popular products and websites, and giving you my personal recommendations. I'm also assuming that if you're reading this, you're an artist who already knows that selling prints is an option and you're looking to make other interesting products instead.

Let's start off with looking at some of the most popular kinds of products available.

Photo by The Clever Clove on Instagram

Enamel pins

Pins are super popular right now.  Enamel pins can get pretty detailed, but just make sure your design will work at a small size. The typical pins is around 1" high. If your design has 20 different colors, then a pin might not be the best choice for you. Most companies will have a maximum color limit, then charge you for extra ones. Text can definitely work on a pin, just don't go overboard. Most of the time, a design can be turned into an awesome enamel pin, or altered slightly to work as a pin design. 

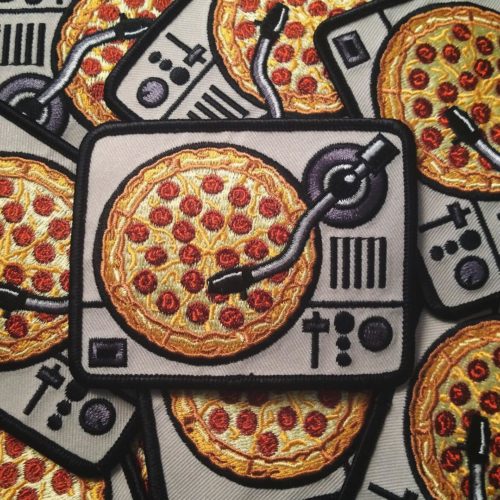
Patch from PIZZA BRIGADE on Instagram

Embroidered Patches

While there are several types of patches, the most popular one is the embroidered patch. If you want your design embroidered, you definitely need to make sure you don’t have too many colors or small details. Text has to be around .25” high to stitch clearly, and most companies will charge you for additional colors over their maximum. Complex details will have to be simplified. You can achieve some wonderful detail with embroidery, but it depends on what your design is. Things like realistic faces will not turn out well at smaller sizes. Colors can be blended, but I would generally avoid gradients unless your patch is very large. You might have to adjust your design slightly to have it stitch well.

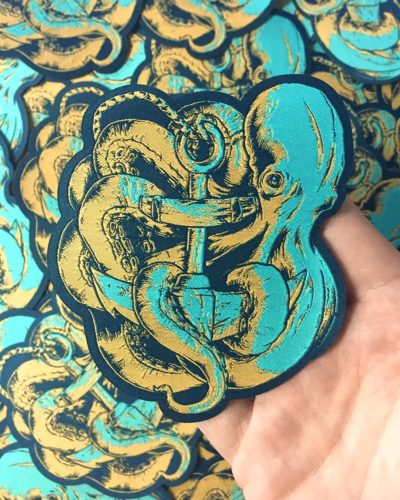
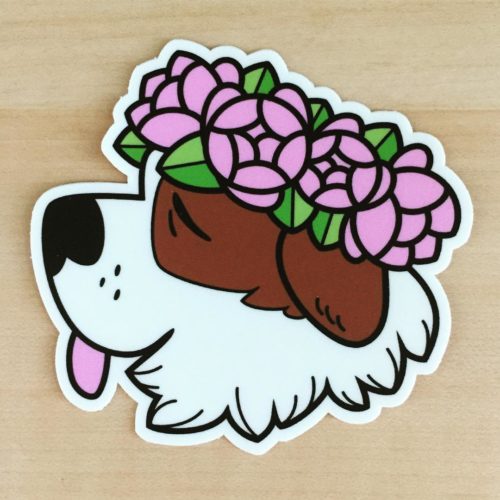
Sticker from Sailorneens on Instagram

Stickers

Stickers are pretty easy and will work with any design. Since it is being printed, you don’t have to worry about text size or number of colors. Stickers are a great option because they are very cheap to produce.

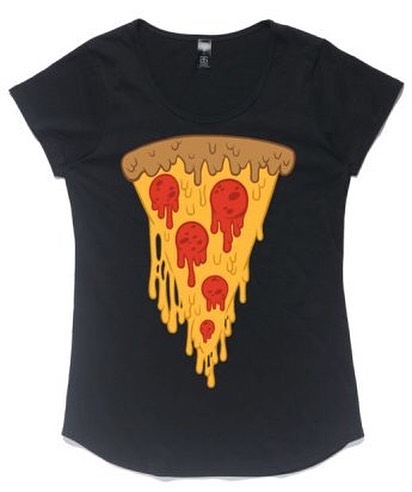
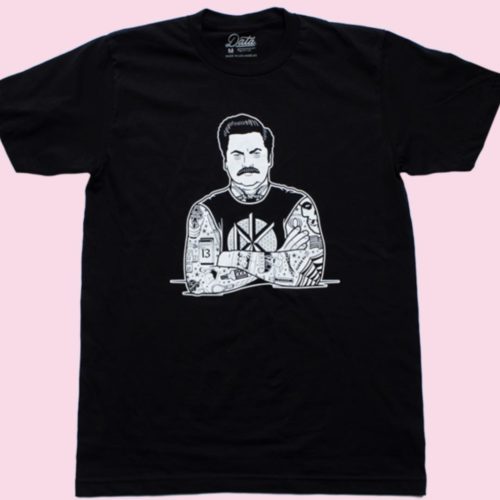
Shirt from Data_Crew on Instagram :: Data Crew Store

T-shirts & Apparel

Shirts can sell well too, but you need to make sure your design in worthy of being worn. There are definitely designs that people would prefer as a patch or pin, but never wear as a shirt. They are also difficult to order in bulk because of sizing. Unless you have a huge following, I would recommend using a print-on-demand service for apparel with sizing options. That way, only the shirts that are sold are produced, and you don’t end up with extra shirts in XS and XXL that you can’t sell.

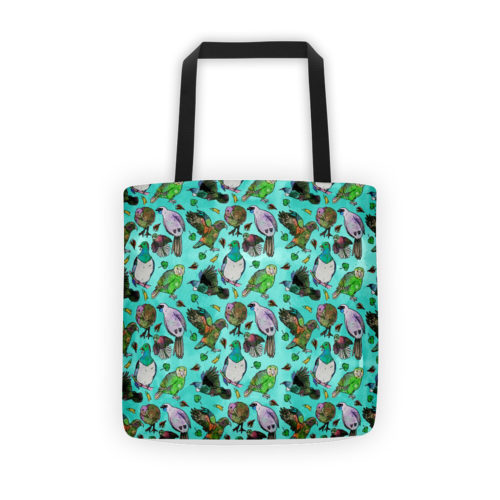
Printed bag from Pepper Raccoon on instagram :: Pepper Raccoon Store

Other accessories

Print-on-demand services that sell shirts usually offer many other products as well. Coffee mugs, bags, hats, phone cases and a ton of other random things. There are certainly designs that would work on many different products, but the most popular ones are relevant to the product they are on. For example, a design about coffee might work well on a mug, but it would make less sense on a bag or hat. These print-on-demand services might encourage you to stick your design on everything possible, but this isn’t necessary. I won't be going in-depth with the large amount of miscellaneous products you could but your art on. I'm going to stick with telling you about the most popular ones.

Hopefully, now you can make the best choice on what will work best with your artwork. Now, let's dive deeper into each product.

Enamel Pins   |   Patches   |   Stickers   |   Shirts & Apparel

So you want to make an enamel pin...

Types of pins:

The most popular types of pins right now are hard and soft enamel. Both look great, but take a look to see which one would look best with your design. Hard enamel pins are mostly flat and smooth. With soft enamel, the metal is raised slightly higher than the colors. The price difference between the two options isn't huge, but soft enamel is cheaper. Hard enamel is more durable than soft, but since there is a top coating on hard enamel, soft enamel's colors tend to be more vivid.

Colors:

You can also specify PMS colors for most companies to try to match, but this isn’t a requirement. You should also decide which parts of your design will be filled with color, and which parts will be metal. Typically, the lines of the design end up being the metallic parts. Pin companies will have options like gold, silver, bronze, black nickel as well as shiny and matte options. Again, this depends on what will work best for your design.

Setting up your file:

Some people assume you might need a vector-based file for a pin, but this isn’t true. It’s certainly great to have your design in that format, but you can also send in a high-res .jpg or .pdf to most companies. The factory will digitize the file for you. As long as your image is clear and high-res, you’ll be ok. With metal pins, your lines can be rather thin and details can get rather small. Companies will usually advise you if your design is too complex.

Quantity:

The more you buy the less money each piece is. With most companies, you will find that they have a minimum quantity and price breaks at certain quantities. It’s usually 100 pieces minimum. Some companies have lower minimums, but their price per piece will be very high. This is really important when you are figuring out how much to sell each pin for.

Ordering:

Now that you know what you want, you can pick a company. You may have heard that there are some factories in China that can make these really cheaply. The truth most overseas companies will only accept bank transfers as payment. Some people consider this risky, and I don’t blame you. Personally, I use companies that sort of act as a middleman between you and the factories. Yes, you will pay more, but in my opinion it is worth it to get your pin right. You can think of these companies like your personal pin brokers. They will pick the best factory for your project, give valuable design and material advice, and you can pay securely. If you want to go directly to China, I urge you to research about protecting your personal information during overseas bank transfers. In my opinion, the peace of mind is worth the extra money. If you're a beginner, I'd advise you to use one of the companies I recommend.

Pricing for most pins won’t vary too much between companies, but don’t be afraid to request quotes from multiple companies. To give you a rough idea of pricing: 100 1-inch pins should cost around $300 - $350.

The ordering process will go something like this: Get a quote from a company, send them artwork, receive a digital proof for approval, send money, receive pins. It's really simple! The time it takes to have the pins shipped to you will vary, but expect it to take several weeks.

Companies that I have used and trust are Custom Patches and GetLapelPins

Backing and presentation

Some companies might also offer a printed backer for your pin. This is a really lovely way to present your product, but you might be able to do it for cheaper on your own. Most backers are about the size of a business card. Ordering 100 cards through Vistaprint can be less than $20 depending on what you want. Companies might also offer to individually bag each of your pins. Ask if this an option and compare prices!

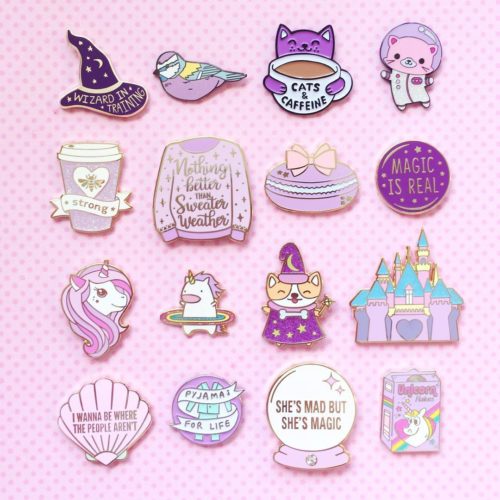
A soft enamel pin by Nate Duval


A hard enamel pin with black nickel by Sailorneens


This 1" pin from Data_Crew shows that you can achieve small details with pins.


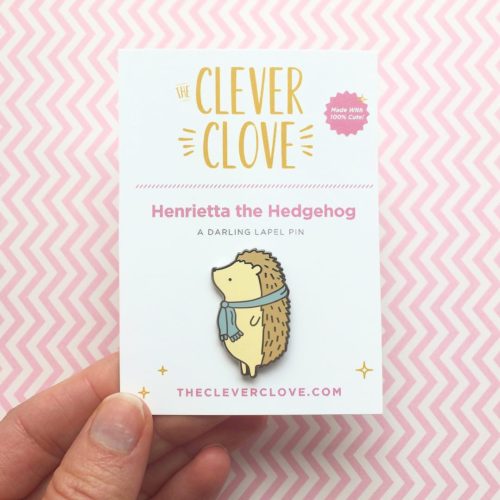
A pin with a backer card by The Clever Clove

So you want to make a patch...

Types of patches:

Embroidered patches are what you are probably envisioning when you say you want a patch. With different stitching techniques, these patches can have a lot of dimension and character. For smaller patches, any text needs to be a plain, san-serif font and about .25" high to stitch clearly.

Woven patches are an option if you need detail that embroidered patches can’t achieve. Text can be much smaller and complex with woven patches. They will lack the textured feel of an embroidered patch. Woven patches are pricier than embroidered ones.

Printed Patches can look amazing as well. This is a perfect option if you simply have too many colors or if you want your art duplicated exactly.

Colors:

With embroidered or woven patches, thread colors are limited to few hundred. If you want to get a patch made, you must be willing to accept that your colors might not match your original design perfectly. Still, feel free to provide the company with Pantone colors so they can determine the closest possible thread color. Chances are, there's a thread color that is very close to what you want. Another thing to consider is the number of colors. Most companies will have a maximum amount of colors you can choose before you have to pay extra. If you want to keep costs down, keep it under your company's maximum (typically 9-10). If your patch is printed, you only have to pick a color for the stitched border.

Embroidery Coverage:

Some companies will have different pricing for the "embroidery coverage" of patches. A patch that is 100% embroidered will be all embroidered thread. A patch with less than 100% will have some of the "twill" shown. You can think of twill as your background color, and there can only be one per patch. Patches with 100% embroidery will cost more than ones that have less. Your embroidery percentage should be determined by your design.

Special options:

Some companies have options for specialty threads, such as glow-in-the-dark or metallic-looking threads. You can also use felt as a twill to give your patch a really unique look and feel. You can also cut out an area in the center of the patch. Of course, these will cost you extra. There is also a technique called ghost stitching where the a thread color is stitched over the same color to give a subtle, almost hidden design.

Backing options:

The standard backing for an embroidered patch will be plastic. There are many options for backings, including iron-on, velcro or adhesive. These will cost you a little more per patch, but not by much. Most people prefer iron-on patches because of how easy they are to apply.

Quantity:

As with most products, expect to have minimum quantity that you need to order. Again, the more you order, the cheaper each piece gets.

Ordering:

(This is the same advice I gave in the pin section.)
Now that you know what you want, you can pick a company. You may have heard that there are some factories in China that can make these really cheaply. The truth most overseas companies will only accept bank transfers as payment. Some people consider this risky, and I don’t blame you. Personally, I use companies that sort of act as a middleman between you and the factories. Yes, you will pay more, but in my opinion it is worth it to get your pin right. You can think of these companies like your personal patch brokers. They will pick the best factory for your project, give valuable design and material advice, and you can pay securely. If you want to go directly to China, I urge you to research about protecting your personal information during overseas bank transfers. In my opinion, the peace of mind if worth the extra money. If you're a beginner, I'd advise you to use one of the companies I recommend.

To give you a rough idea for pricing on embroidered patches:
100 3" patches will be around $150 - $200. This can vary depending on what you options you select, of course.

Here are some companies that I know are trustworthy:
Stadri Emblems
Made by Cooper

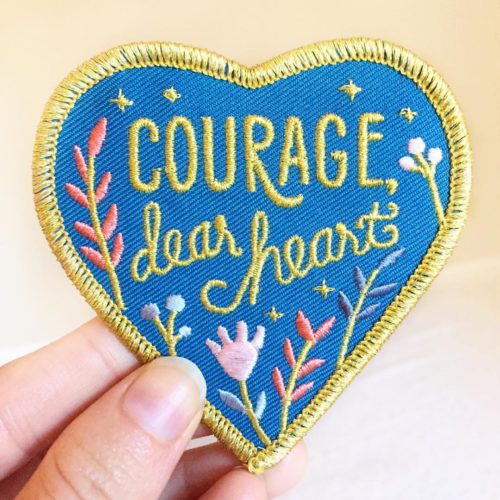
An embroidered patch with a less than 100% embroidery percentage by The Clever Clove.

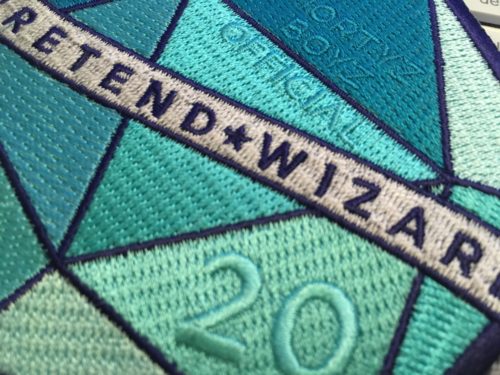
A woven patch that shows incredible detail by Seventh.ink

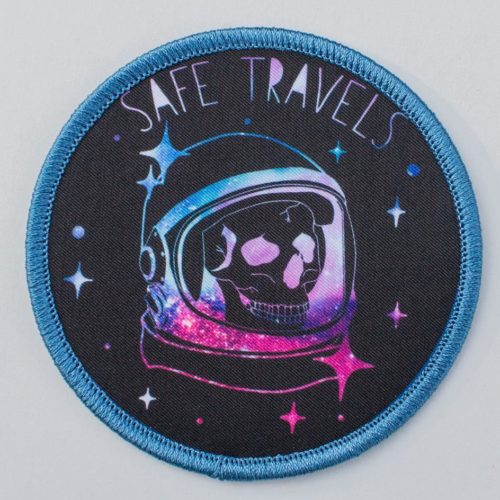
A printed patch by Major Crimes Division

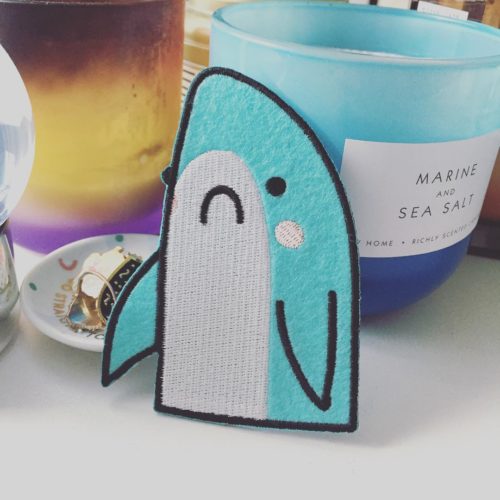
An embroidered patch with a felt twill by Kodiak Milly


One of my latest patches uses the ghost stitching technique. 

So you want to make stickers...

Stickers are by far the easiest to produce and also the cheapest. You also have a lot of fun options such as making die-cut (cut to shape) or even sticker sheets.

Setting up your print file:

Each company will have their own directions for how to send them files, but you will most likely need a cut line and bleed on your design. The cut line is simply to indicate the shape of your stickers. The bleed, which is kind of like extra padding on your design, is simply there in case the cut is a little off. If you have trouble with this, most companies will assist.

Using stickers as freebies:

Since stickers are pretty cheap, some people like to include them as free items with the purchase of more expensive items. This is entirely up to you.

Costs:

To give a rough estimation of sticker costs: 100 3" stickers should be around $80 - $100

A company that I recommend is Stickermule

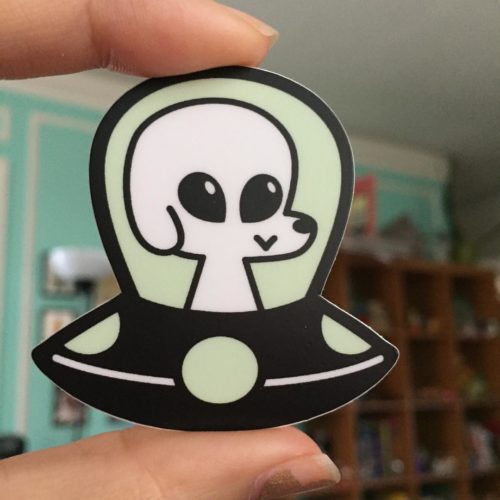
Diecut sticker by Sailorneens

So you want to make apparel...

Shirts are almost the opposite of the other products I mentioned. Since apparel isn’t one-size-fits-all, having shirts made as they are ordered is usually the best options for most people. There are a ton of shirt companies out there that will handle the printing and shipping of shirts for you.

You have probably heard of print-on-demand services where you simply upload your art, then get a small portion of each one sold. Zazzle, Redbubble, Cafe Press, Society6 are all options. There are, however, several downsides to using these services. The marketplaces for these sites are massive and it’s easy for your designs to get lost in a sea of other options. Also, the cut you receive for each sale can be pretty small.

For these kinds of sites, you can control the price that you sell your products for. They will give you a suggested price for each product to guide you. It’s safe to assume that you’ll make a few bucks per sale on sites like these.

A company that I really love is Printful. The best thing about them is that you can integrate their drop shipping service with online stores such as Shopify, Amazon, Storenvy, and Big Cartel. There is also the option to use your logo and branding on the packing. They also offer custom printed bags, leggings, phone cases, pillows and a lot more. This is a great option because it lets you easily have your own store and identity instead of getting lost in the millions of designs on RedBubble. Once you have your files set up, they take care of everything else for you.

This leads me to the next topic…

Pizza Tee by Pepper Raccoon


Custom printed leggings by Pepper Raccoon

Where to sell

There isn’t a single answer that will work for everyone. It really depends on what you’re selling and how much of an audience you have. You can make you own website, or sell on a marketplace. You can do both too!

Selling on an online marketplace


There are certainly a ton of options for selling on online marketplaces. The advantage to using a marketplace is that there is chance for someone to stumble upon your work by searching for keywords. These sites also make it pretty easy for you to create an online store easily and quickly. The downside is that these sites will want a cut of each sale. The amount you pay per transaction is small, and I think it's worth the money for the ease of selling.

Etsy
Etsy is a popular site for indie artists, and I have personally sold many many items there. It's an easy site to use, and since it's so popular, you'll get a lot of new fans. They charge 20 cents to post an item for sale, then a 3.5% fee is taken for each sale. You collect all of your sales as they come in, then pay Etsy your fees once a month.

Storenvy
Storenvy is almost too good to be true. It is 100% free for your own shop, and they charge a 10% fee if purchased item was through their marketplace. This means that if someone clicks on a direct link to your store and makes a purchase, you don't pay a fee. If someone discovered your item through browsing their marketplace, you pay the 10% fee. It can also integrate with Printful, which is my personal favorite on-demand printing service.

You also might have heard of Shopify & Big Cartel as selling options. Here is a really great article that will explain the differences.


Selling on your own site


The advantage to making your own e-commerce site is that you have full control over what customers see. But, you’ll need a way to drive traffic to your own site and it can be a lot of work to create. It’s up to you to market yourself, since the chances of someone just stumbling upon your design are a lot smaller if you're not on a marketplace. This is a great option if you have a huge following, but if you're just starting out, I'd use one of the marketplace options I mentioned above.


To crowdfund or not


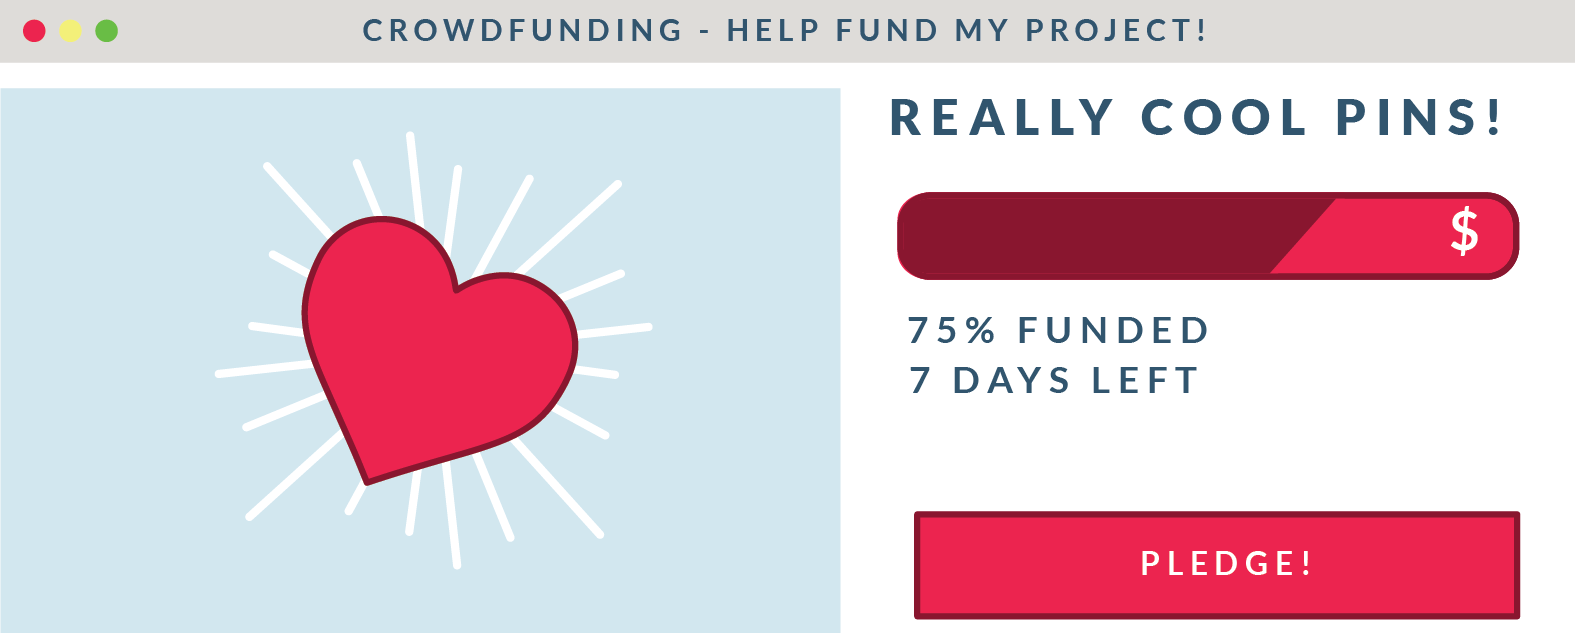
Crowdfunding is popular for a reason. Even though you have to share a cut of your money with Kickstarter or Indiegogo, the cost is usually worth it. Crowdfunding sites will often do as much as possible to promote campaigns (more money for you means more money for them). I have used both Indiegogo and Kickstarter, and honestly, both are great options. Indiegogo featured my project on their facebook page, which was a really nice surprise. A big difference with Indiegogo and Kickstarter is that Indiegogo will give you the option to keep the money even if you're not 100% funded. With Kickstarter, you must reach your goal to collect anything. I have had great experiences with crowdfunding, and I'd recommend trying it to fund your projects.

Kickstarter fees: 5% of total funds + 3% + $0.20 per pledge processing fee
Indiegogo fees: 5% of total funds + 3% processing fee + other fees depending on your situation

Are you afraid of crowdfunding?
Don't be. You might be concerned that you don't have enough followers to have a successful crowdfunding campaign and be hesitant to try it. The worst case scenario is that you don't hit your goal. Even then, you don't have to pay any fees if funding is unsuccessful. If you are just trying to get enough money to order 100 pins or patches, you're only going to need a few hundred dollars. Don't forget that people browsing the crowdfunding sites will stumble upon your project as well. You don't need a follower count in the thousands to have a successful campaign. 

Let's say you want to make some patches, and you've determined that your goal should be $400. If you offer your patches for $10 a piece, you only need 40 people to pledge. It's also smart to offer lower priced pledge offerings, as well as higher priced bundles. For example, it's common to offer a $1 pledge in exchange for a "thank you" email, or offer something like 2 patches for $18. Make sure to offer a variety of rewards in your campaign.

In my last enamel pin Kickstarter campaign, I also offered stickers. I had a pretty good mix of people who wanted a set of stickers for a lower cost, but also several people who wanted a bundle of everything I had to offer. It's good idea to take some time to look at other successful campaigns and see the kinds of things they offer as rewards.

Shipping

If you’re going to be handling the shipping, make sure you carefully calculate the cost. Also make sure to factor in the cost of the shipping container. If you are unsure how much it will cost to send an item, the easiest thing to do is to bring the item right to the post office and have them weigh it and give you the price options. Here are some bubble mailers on Amazon that will work well for pins.

International shipping can be tricky since the prices can vary from one country to another. It can also be pricey to track packages once they leave the US. Some sellers decide to only sell in the US because of this reason. I have unfortunately had a few packages get lost while trying to ship outside of the US. It usually makes it there just fine, but lost mail does happen. FedEx and UPS are good options for international tracking, but they will cost you much more than your local post office. It's up to you how much research and time you want to put into your potential international customers.


Self Promotion

Self promotion is difficult for a lot of people. It’s hard to strike a balance between posting too much on social media and not enough. Some people post work-in-progress shots several times a day, and some people are scared to post more than a few times a week.

Make sure that each of your social media posts are interesting and not too similar to your last one. People are interested in work-in-progress photos, but we don’t need to be bombarded. I've unfollowed people who went way too overboard with work-in-progress shots. I simply got sick of seeing the same drawing 10 times a day. If you don’t have a great update, don’t feel obligated to post for the sake of posting. If you’re afraid of posting too much, limit yourself to 1 post a day, or every other day. Whatever you feel comfortable with. 

When I was running my last kickstarter campaign, I was worried that my followers would get sick of me asking them to check out the campaign. The trick is to vary your posts enough that people don’t tune you out. Instead of just linking to your campaign with the same image, switch it up. Use different images, talk about your process, get happy about your progress, and talk about stretch goals. You’ll sound less like a broken record if you get creative. Just don’t become a spam bot.

Even if you’re not an avid Tumblr or Instagram user, there are people on those sites that should be seeing your work. Don’t neglect a social media account just because it’s not your favorite one. For pins and patches specifically, try getting featured Patchgame on Instagram. This popular account promotes awesome pins and patches. Even if you don’t get on their main account, use the hashtags #pingame #patchgame#pinstagram #pinsofig Tagging your work appropriately is important. Just take a look at what other accounts are using if you're not sure what to do.

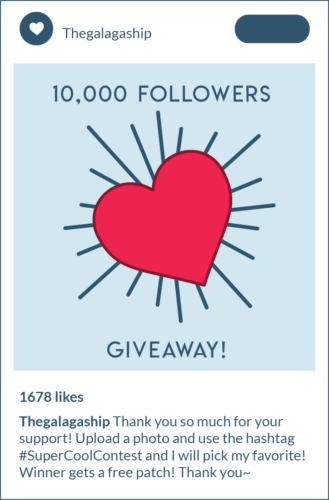
Another popular tactic is to do a giveaway. Promise to give away a free item to someone who shares your post and follows you. Most people are happy to give your a free promo in exchange for a chance at free stuff. It's a small price to pay for new followers and shares.

Lastly, just don't be afraid to talk to people. Like and share other artist's products. If you like something they did, tell them! If you don't know how they made something, ask them! Make friends and join the community online. From my experience so far, the pin community is incredibly nice.

Presentation is important

There are a lot of cool products out there, so you need yours to stand out from the crowd. Taking nice photos and presenting yourself in a professional manner is very important. Take time to make your social media posts fun and interesting. If you need a nice cheap backdrop for photos, go to the scrapbook section of your local craft store. You can usually buy individual pieces of printed paper for cheap. Place your item on top, and your presentation points just doubled.

Self promotion can be difficult for some. But the bottom line is that you shouldn’t be afraid to put yourself out there. If something isn’t working, try something else. For the most part, it’s all up to you to make it happen for yourself.

An example of great presentation by The Clever Clove

Now it's your turn...

I'm hoping that this will give you the confidence to move forward on that project that you've been thinking about doing. There isn't a one-size-fits-all answer to creating and selling your own products, so use this guide as your starting point. That cool artist that you follow on Instagram that has tons of amazing things for sale had to start at the beginning too. I'm really hoping that this cleared up some of the mystery for artists who wanted to jump into this world, but didn't know where to start. Good luck with your next project!

Brittney is a creative producer at Kingston Creative, which is a digital marketing agency in Kingston, NY that offers branding, marketing and website design and development services. In the past, Brittney has successfully funded a Kickstarter campaign for video game pins, funded a charity drive through cat plushies on Indiegogo, sold patches for her Dungeons & Dragons podcast Pretend Wizards, and created a Tumblr blog about retro video games that's been viewed millions of times. We're proud to have her creative expertise on our team!

Posted in Art